Painting Iyanden – Wraithguard / Wraithblades – Part 1: Guides, Basecoating & Yellow
I thought I would start doing posts about how I painted my army if anyone what to achieve these results or wanted to take the technique’s and use them for another paint scheme. I consider myself to be an intermediate painter at best (especially after coming back from this years LVO) and when hobbyist see my army I usually hear a comment of “Oh that yellow must have been a pain(or really hard etc.)” and actually it was quite easy. STOP THE PRESSES!! Did he say easy!? That’s right I did. Now my models aren’t going to winner a Golden Daemon or anything but I think they look great on the tabletop and were pretty easy to pull off. I can easily say the black and blue on these models were way no of a pain in my ass then the yellow as they had two highlight colors and the yellow only had one. I had to have a lot of patience but if I can pull this off then anyone can; so on with the sharing because that’s what this blog is all about.
But first a little history…
Originally I hated the Eldar! When I first got into the hobby back in junior high school the only players that actually played games were Eldar players and I don’t think I even won a single game. But I always loved their story, the fluff behind the army and the models have always been beautiful both then and now. Once I discovered the Iyanden Craftworld I knew I was in trouble. The whole history of the craft world completely intrigued me but I was very intimidated by yellow. Then I saw the Paint Splatter section of the June 2013 White Dwarf and saw that I could actually pull it off. That’s when I decided to pull the trigger on the Iyanden project.
Guides:
A lot of people give Games Workshop (GW) a lot of crap about White Dwarf lately (though I’ll be the first to say that Visions is pretty much crap… I mean a catalog) but one thing I think they are knocking out of the park is the Paint Splatter section. All of the Wraithguard and Wraithblades in my army have been painted right out of June 2013 ‘s White Dwarf Paint Splatter section.

Another great investment if you are planning on painting an Eldar army is the Citadel Minitures’s How to Paint: Eldar painting guide and it even has a focus on Iyanden. If you are starting an Iyanden army and are a beginner/intermediate painter then I would highly suggest picking this up. It’s worth every penny.

Basecoating:
I start the painting process with a white basecoat. I use Privateer Press’s P3 White Basecoat spray as I find the can can go further than the GW white spray not to mention a better white coating (in my opinion) as it comes out in a vertical fan instead of the cone with the GW cans. I find that I can control it better than the GW spray and save paint. All that said I find any white spray much harder to work with then black. Be sure to shake your spray can a lot before use. I shake for 5 mins. It’s boring as hell but worth it in the new. When you are finished turn the can upside down and spray the can until you don’t see paint coming out. This will keep the internal tube from clogging up. I won’t go into how to basecoat here as that’s covered in many other places much better than I would go over here.

Sorry didn’t have a good pick of and Wraithguard or Blades just white but you get the idea 😉
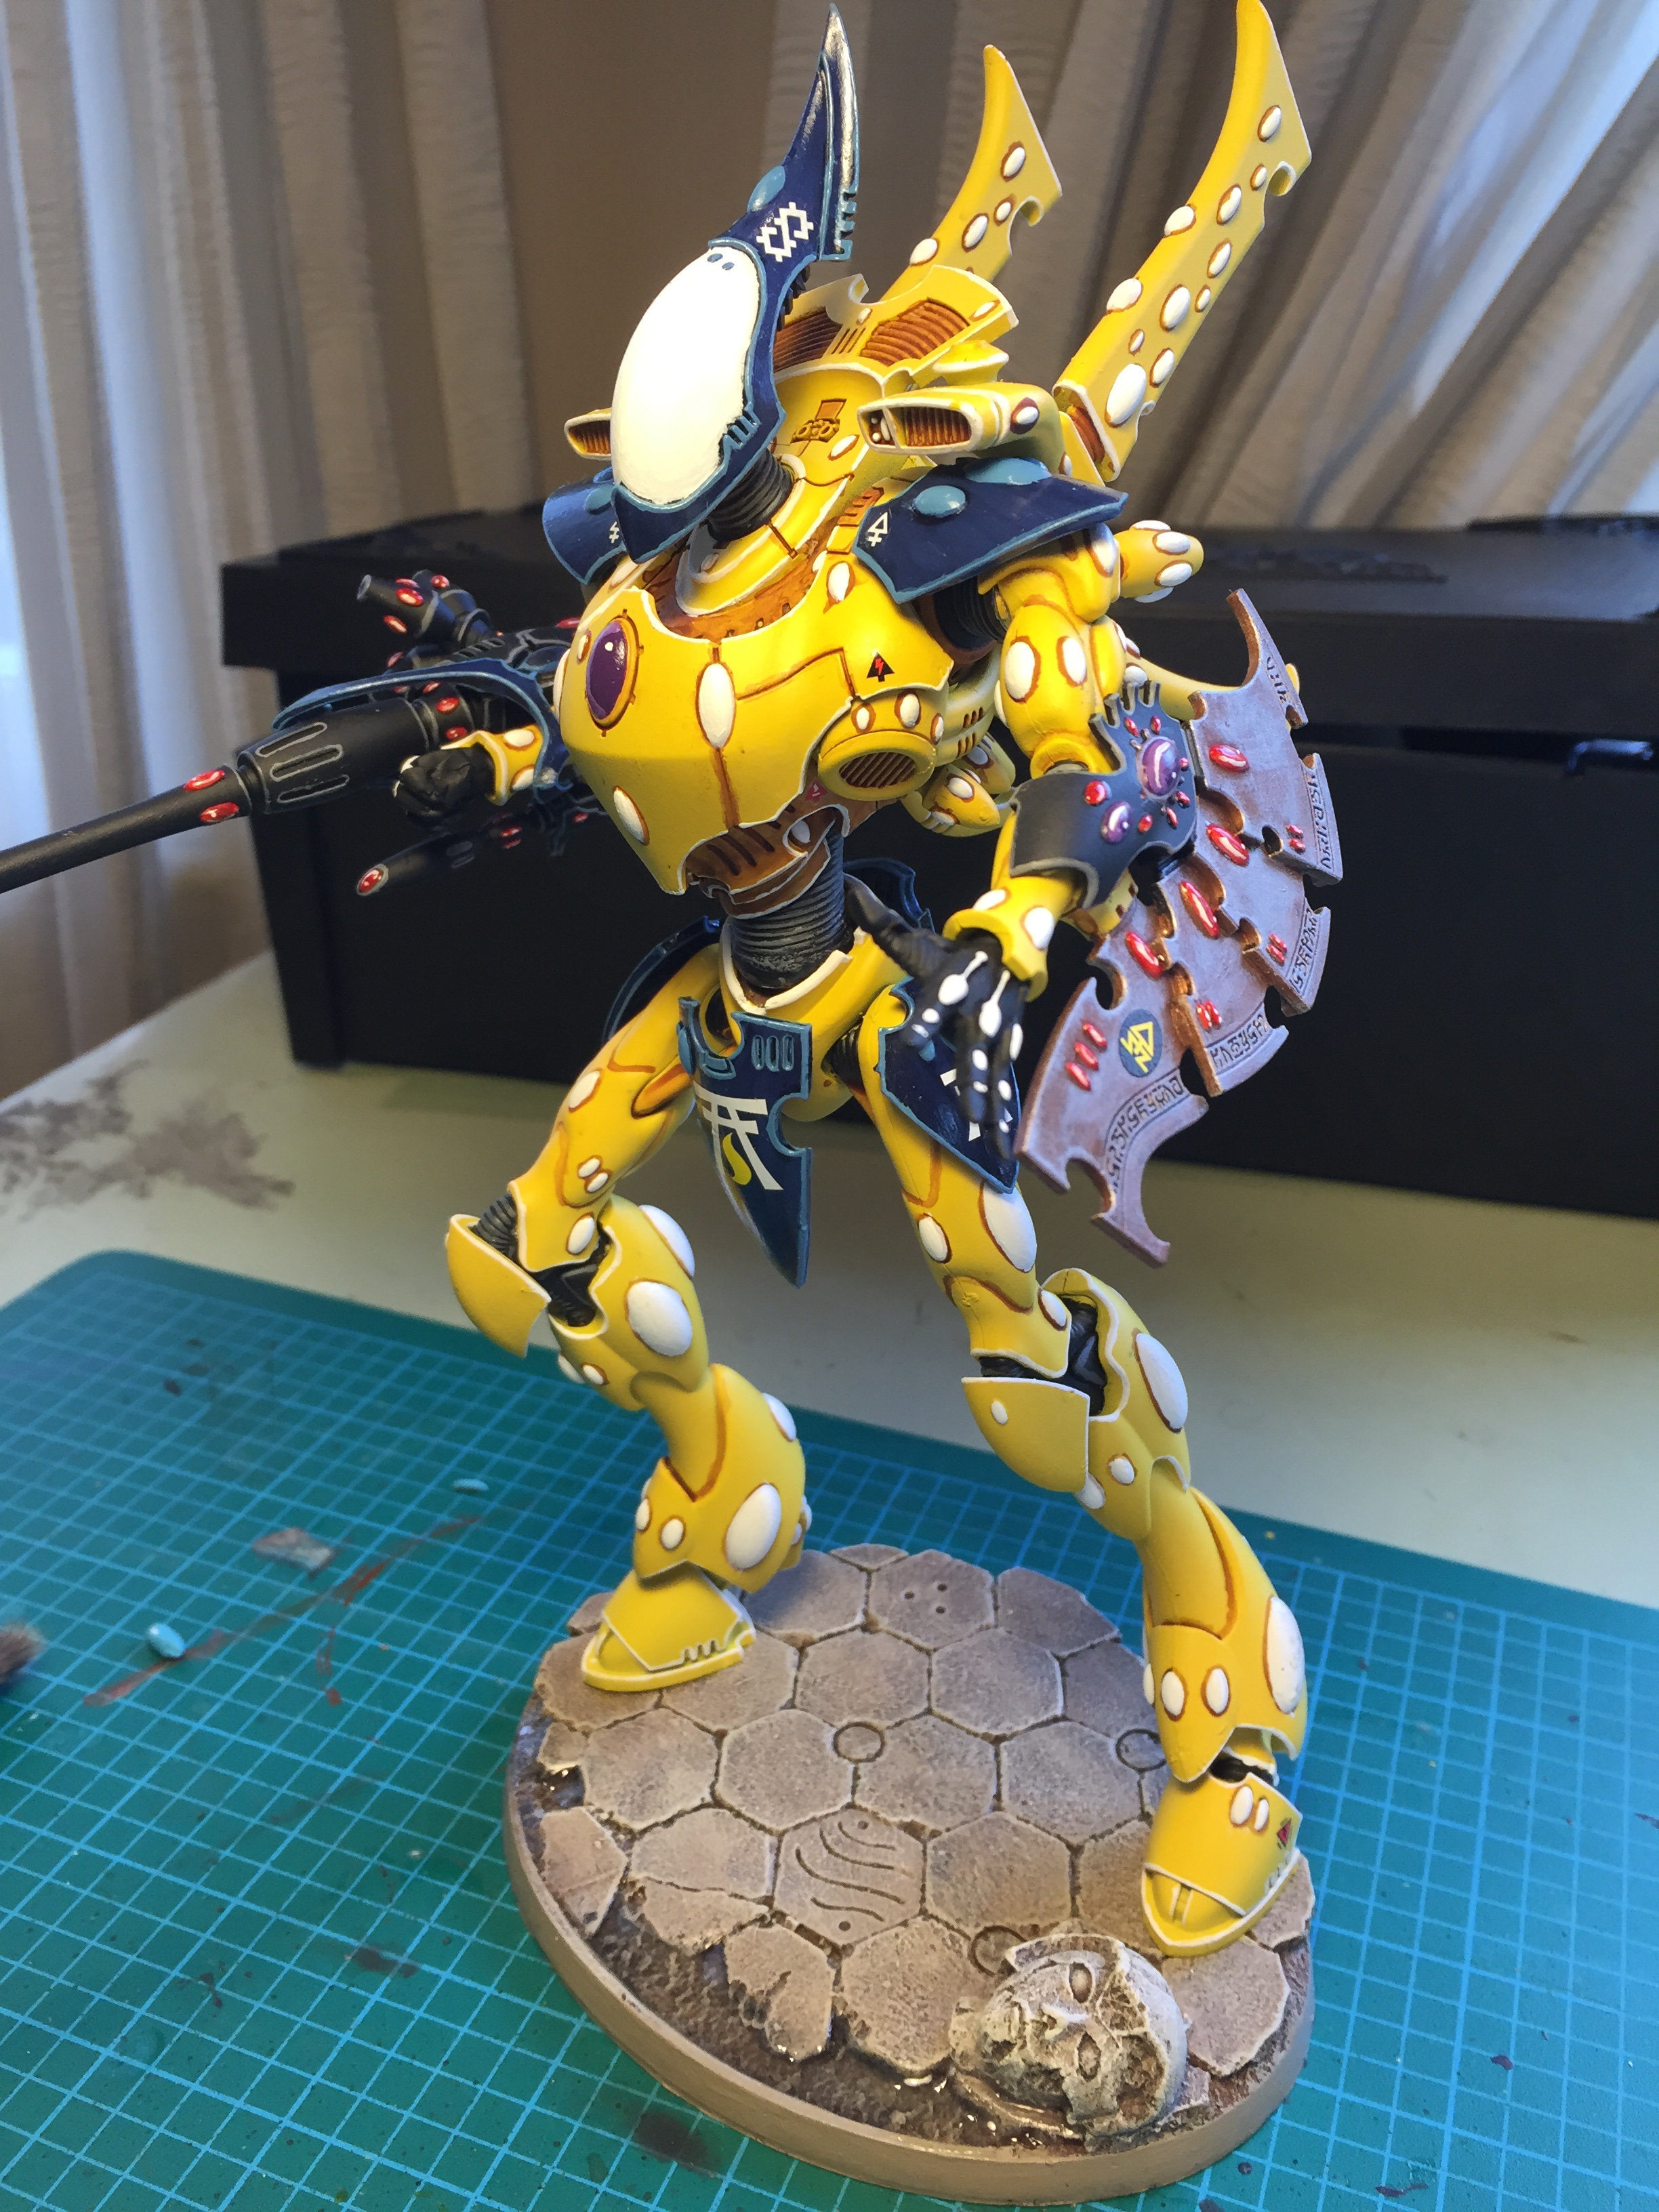
The Yellow:
Now the meat and potatoes… the Yellow. I got this affect by using the GW Seraphim Sepia wash applying it with a wash brush and ensuring that the grooves and recesses of the model got more wash then the surface area. The 20 wraithguard models I have I did in two 10 man rounds back to back and after painting the Wraithblades I feel that I went too light with the wash but in the end I can live with the Blades being a bit darker (mostly in the grooves and recesses) than the Guard models. One thing you need to do with this method is you have to apply all the yellow more or less at once and you have to get the right shade of yellow in one application. If you don’t and add another layer of wash your going to get a much darker yellow then what I have here. I hold the Wraith’s back fin’s (failing on my fluff here) and paint the whole model in wash. Not sure you would want to try the dipping method with Iyanden as I’m pretty sure they would turn out darker than you would want.

Once the main body of the Wraith is dry I then do the back fins. I will admit that the first 5 guys I did I with this method ended up going into a bucket of Simple Green to get stripped. This was mostly due to the fact that I didn’t know how to control the wash yet or how much to get on my brush. This all came with practice. If you have an old model (preferably a guardian or some other model that is smooth with the Wraith’s) I would suggest trying this out on it first just to learn how the wash reacts to the smooth surface and practicing how to get the grooves and recesses darker than the main body with a nice transition between the two. You can accomplish this by using you brush (and gravity) to pull the wash away from recesses and lines on the model.

Rereading this I feel like I’m making this sound more difficult than it actually is so don’t let this scare you. Break the fear of yellow!! And there’s only one way to break that fear and that’s doing it. So try it out and let me know what you think.

Tune in for Part 2 where I will go over the next steps the blue and black on the models…